If you will be in the Missoula, Montana are at the beginning of October and you are interested in issues that impact cultural preservation, nature, and the environment, then you may want to visit the 3rd Annual Montana CINE International Film Festival. This festival will be held on October 5, 6, 7, and 8, 2006, and it is hosted by the International Wildlife Media Center, the same people who put on the International Wildlife Film Festival. For more information on attending please keep reading.
What This Festival Is About
The 3rd Annual Montana CINE International Film Festival is a film festival that explores the cultural issues that impact nature and the environment. Issues like culture, conservation, politics, agriculture, urban sprawl, society, industry, and war will be discussed in regards to their impacts on the natural world. Activities will center on the festival’s mission of understanding these issues better as they relate to the health of the world’s ecosystems.
Events
Like the International Wildlife Film Festival, the Montana CINE International Film Festival will offer several venues of interest for both filmmakers and the public. Public screenings, discussions, workshops, outings, and parties will be scheduled for the festival’s attendees. Schedules for these events, as well as activity descriptions will be made available in mid-September.
The public screenings of the winning films entered in the CINE film festival will be shown at the Historic Roxy Theater. This theatre is located at 718 S. Higgins, Missoula, Montana. A list of times, film titles, and film descriptions will be available at http://www.wildlifefilms.org by mid-September.
Discussion and workshops will also be offered to festival attendees. These programs will focus on specific topics, and they will be moderated by an industry professional. Information about the discussions and workshops can also be found online at http://www.wildlifefilms.org, as information becomes available.
Parties and activities are also a highlight of this festival. These parties will be held at various locations around Missoula, and each will have its own unique theme, attractions, and activities. The festival’s parties are great for meeting with the filmmakers, meeting people who have an interest in environmental issues, and just experiencing western hospitality. Tickets for the parties can be bought at the Roxy Theater, or by contacting the CINE Festival coordinator.
Attending the CINE Film Festival
The price for attending the events held during the CINE Film Festival will vary depending on the type of ticket you buy, your age, and the event you want to attend. General Admittance tickets for viewing a screening will be $6 for adults, $5 for students with a valid student ID, $5 for seniors 65 and older, and $3 for children under the age of 12. If you would like to buy a day pass, which is good for attending all the workshops, discussions, parties, and screenings for a specific day, then the price will be $15. If you would like to just see the screenings during the festival you can purchase a screening pass for $25, which allow you to see as many screenings as you want during the festival. If you want access to everything during the festival then you can purchase a festival pass for $50. Finally if you want to buy a ticket to a specific event or party you will need to contact the Festival directly for prices.
Contact Information
If you have more questions, or if you would like to buy your tickets before the festival please contact the CINE Festival at:
Montana CINE International Film Festival
718 S. Higgins Ave.
Missoula, Montana 59801
(406) 728-9380 phone number
(406) 728-2881 fax number
iwff@wildlifefilms.org
http://www.wildlifefilms.org
Wednesday, March 16, 2011
Montana CINE International Film Festival in Missoula, Montana
Creative Garden Art: From Trinkets to Treasures
Did you know that you can give new life to nearly any old object? Not only can these ‘recycled items’ add unique charm to your home, but they also be incorporated into the garden. With just a little bit of imagination and a lot of creativity, an ordinary garden can be given the ultimate makeover—one full of character and history. Objects for this task can be found just about anywhere. You can even make use of your own personal possessions that you may have found difficult to part with in the past.
In the garden there is a place for everything, especially containers. Some of the most commonly reused objects that can easily be transformed into interesting containers include plastic jugs, old pots and pans, baskets, and tires. You can also use an old wash tub, sink, or wheelbarrow. For a more personal touch, consider recycling a pair of outgrown boots that were once yours or perhaps belonged to your children. As long as your object allows for drainage, nearly anything goes. For items without drainage holes, simply poke a few in the side or bottom with a drill or other suitable instrument. Don’t get rid of those aged flowerpots; give them a face lift instead by adding some paint or mosaic tiles.
Plastic soda bottles can turn into unique ‘piggy’ planters. Simply cut a section out of the side to hold a small pot. On the other side, add some feet; this will also give the planter support. Typically, I use an egg carton for this; you may use whatever is on hand. Choose your favorite color and paint the bottle. Add some eyes and ears; the nose comes from the bottle’s lid. Now place a flowerpot into your ‘piggy’ planter and set it in a location of your choosing.
What is a garden without interesting focal points? Large objects make great eyepieces. Wheelbarrows, tubs, old mowers, and statues are some good choices. Fountains and other water features can easily be made from old objects that have just been lying around. Use pieces of pipe, old sinks and tubs, or different sized pots and pans. Welcome birds into the garden with creative sanctuaries. Turn an old mailbox into a festive bird retreat or feeder. Transform dishes into splashing bird baths. Worn-out tools and other similar items can quickly become treasured garden pets. For instance, post-hole diggers can be changed into magnificent alligators. Flowerpots can magically be transformed into cute puppy dogs. Turn saw blades into artificial flowers with some paint; attach to stems made from pipes or broken tool handles. Maybe you would prefer to create sundials from the blades. It’s totally up to you.
Everyone enjoys the whimsical sounds of wind chimes, and these can easily be made from various scrap metal parts. Wind sounders can also be created from strips of metal and twisted into shape. If you have an excessive supply of glass canning jars, drop some tea light candles into them and line walkways or even a deck to add subtle light for get-togethers. Old coffee, soup, or paint cans may be used as well. Simply punch decorative designs into them, add some paint, place a candle inside, and enjoy. Stones and weathered stumps or logs even have potential in the garden. When uniquely placed, these objects can provide additional interest throughout the garden area. Do you like collecting things? Integrate them into the garden. For instance, a collection of bottles or sea shells can be utilized as edging for beds. Ladders, gates, or bed frames can make an attractive trellis for your plants. Dishes can be used in place of mosaic tiles for decorating a variety of objects.
No matter your level of artistic ability or skill, art is art. With any type of art, there is no right or wrong. Objects of all sorts can hold hidden potential. Whatever you see in an object, you can do. All you need is some creativity; as imaginations are never-ending, so are the possibilities.
The Creation of Art is Subjective

source
The Creation of Art: A Review
The Creation of Art: New Essays in Philosophical Aesthetics edited by Berys Gaut and Paisley Livingston is a great book. As a person who loves art, I was excited to read a book dealing with art from a philosophical perspective. I was particularity impressed with the essays talking about genius and creativity. Therefore, these essays will be the focus of my review.
According to Guyer, genius is a gift for invention. This gift leads to originality in representation (Guyer116). He also claims that what the genius does is that he uses art to represent the freshness of nature (Guyer122). By stating this, I believe that he wishes us to see that when the genius uses nature as his canvas he wants whatever he paints or sculpts to be as fresh as the outdoors themselves.
I agree with Guyer's definition of genius. A genius doesn't just make a copy of what he sees in nature. Anyone with a small amount of artistic talent could do that. A genius seems to be able to take what he sees and shape it in such a way as to make it his or her own. For example, an artistic genius might paint a rose blue instead of red or pink. A statue may be sculpted out of gingerbread cookies instead of clay. A poem can describe the sunset as ‘rainbow sherbet melting in the sky'. Artistic genius seems to spark imagination. I also enjoyed the way he described Kant's view of what a successful work of art entails. A piece of artwork qualifies as a success when it brings human beings pleasure because its form and content starts a free play with our imagination and understanding (Guyer 127). This makes sense because some of the poetry that I write is inspired by what Kant calls ‘successful artwork'. For example, the first time I saw Van Gough's "Starry Night", I wrote a poem entitled "Imagine the Night Sky."
I also like the fact that Cohen states that human beings who appreciate fine art must posses a bit a genius (Cohen 145). This is because it seems that we are geniuses when we can appreciate Shakespeare or Van Gough. It seems that being a genius isn't ass hard as first appears. It seems that all it takes to be a genius is the ability to change the ordinary or the ability to appreciate the extraordinary. However, it is unclear what it takes to be an appreciator of fine art or to have something labeled an appreciator of fine art. It is also unclear how much an artist must change something to be called a genius. Therefore, being labeled a genius isn't a clear cut decision. In other words, many factors may play a part in being labeled a genius.
Olsen does good job talking about creativity. I like the way that he uses Shakespeare to describe what poets do. Shakespeare claims that a poet's pen "gives to an airy nothing a place and a name" (Olsen 192). This description reminds me of Plato. According to Plato, the Muses are vital to poets: "If anyone comes to the gates of poetry and expects to become an adequate poet by acquiring expert knowledge of the subject without the Muses' madness, he will fail" (Phdr 245a). The Muses seem to help the poet's pen give life to nothing.
The discussion of the creative personality is provocative. Creative people may have non-conventional thoughts. This may be due to a need to resist being mainstreamed on society. A creative person wishes to give into his or her own unique nature (Olsen 196). I think that a creative person can have a unique nature and still create a painting, poem, or short story using a very structured regimen. In other words, creativity doesn't have to give way to convention and structure. One thing that a creative person might create is a fictional character. However, many philosophers have argued that fictional characters can't be created. I don't agree with the idea that fictional characters have no reality at all. It makes more sense to believe that fictional characters come into being only because of the mental and physical acts of an author. Because of this, fictional characters have become part of most cultures.
While most of this book was informative and interesting, one essay that I read was boring. The essay deals with the origins of creativity. The explanations of the origins of creativity are cognitive, biological, and social. The argument seems to be that creativity comes from all three sources. This comes as no surprise to me. In addition, the biological portion of the essay was a bit confusing.
This book is worth reading because it stimulates and educates readers. Also, it has put art in a new perspective for me. For the most part, people will not need a background in art to understand and enjoy this book; therefore, I recommend this book.
1
Sunday, February 27, 2011
Photography Insights and Techniques

Photo Credit: celtics baby clothes
One might ask what photography is. What is the purpose of taking a photograph? For some, just a simple snap shot will do but, for others, there is more of a destiny to experience in the photograph. Photography captures a split second in time or, simply put, a moment captured in a blink of an eye. Photographers create illusions of realism which resembles the existent world with content and form that are inseparable. In effect, the photographer has generated a story all their own.
Photography is made from anything perceived. Seeing is believing when the moment is captured on film regardless of the subject matter. No matter how many pictures are taken of the same subject by different individuals, the photographs will never be the same “style” because the subject is in the eye of the beholder. For example, you may like that shiny red 57’ Chevy in the front of the coffee shop, so you take a photograph. Your friend loves the seat in front of the coffee shop window with the reflection of the 57’ Chevy in the glass. There are two distinctly separate shots of the same subject but, emotionally, they are very different images. No two artists are identical and different viewers will never see the same photograph in the same manner. Photographs generate a mood that creates an emotion and they can be background or landscapes or nothing but a mere rust spot with texture.
Photography not only captures that instantaneous moment in time but also captures a visual reality. Photography, when it was first invented, was used to represent the world accurately with little room or depiction of artistic ability. Thus, the photographer could have been anyone in the crowd, and that person brought forth the way things looked at the time—showing the world what is to be perceived.
This is not the ways of photography in the 20th century. Photography is now a truly unique art form, and a photograph can hold two and three dimensional space, as well as a one point perspective. Photography gives us the opportunity for aestheticism our everyday world. Our attention is focused on what we would normally dismiss our attention focuses on seeing beyond the believable giving a visual sensation to our minds. A photograph can be captured in one-sixtieth of a second by the shutters of the camera. In effect, art happens in the “blink of an eye”.
Since Kodak introduced the first hand held camera in 1888, giving photography a new mission and meaning, the world has never been the same. However, the technological advances have affected photography. It has strengthened the use of a camera and allowed the photographer far more precise subjective perceptions of the subject matter. According the book The World of Art, Life Magazine started publication in 1936, and American photography used photography as their tool of disclosure. “Pictures can be beautiful, but must tell facts too,” reveals the text. Photographers must include real life recognition with lines and rhythms of the surface because, without this, the photograph would be unresponsive. As an interesting insight, a horizontal photograph is peaceful; a photograph with less foreground brings dramatization and a photograph with more foreground shows nature connected with unity.
Photography is different than other art medium, yet the classical compositions brought together by the artists of yesteryears are still used. Photography has many techniques and art forms that differ greatly. For instance, there is black and white photography that the photographer can develop easily in even a small amount of space. According to photographer and Professor of Art Mike Wonser, a dark room can be set up in a bathroom. The light must be blocked out, but the photographs can be developed in the bath tub! So, you do not need much space to work and it is magic to watch the photograph appear. Another simple technique was shared by George Jolokai. He stated “a photographer can carry a bottle of water to add shininess or reflections on the subject matter”. The magic of photography is endless.
Another tool used in photography is the use of slow or fast shutter speeds. Slow shutter speeds can blur water, but the use of slow shutter speeds requires a tri-pod to prevent blurring the entire photograph. The water will blur because water is in constant motion but the background or other subject matter in the photograph remains still.
Another form of photography is that of color photography. Color brings depth and musical rhythm and is a very powerful tool to the human senses. Color photography creates a complex interplay between form and content that can create dynamic color contrasts. The photograph process takes time because critical technical decisions must come from the photographer before the release of shutter that results in the capturing of an essence of time and mood on film.
The basic elements of style, composition, and technique are the photographer’s tools for structure; it is the photographer’s imagination that leaves an impression embedded the minds of the viewer.
References
Joloki, George (2004, Spring). Lecture Art 101, Central Oregon Community College, Bend< Oregon
Sayre, Henry M. (2004) A World of Art (4th ed.) Pearson Prentice Hall.
Wonser, M. (2004, Spring). Art History 203, Central Oregon Community College, Bend< Oregon
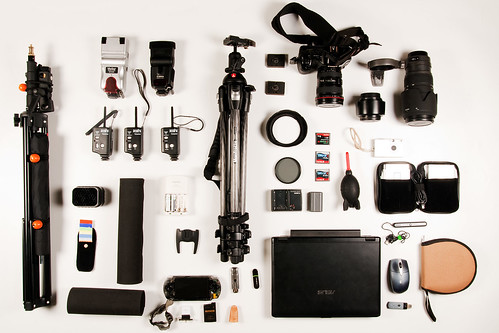
Wildlife Photography: Tips to Learn the Basics of Wildlife Photography
photo source
If you really want to learn the art of wildlife photography, then you should be aware of the basics of wildlife photography. It is rightly said that wildlife photography is one of the most challenging but rewarding hobby or career. It takes honest practice, persistence and hard work to master the real art of wildlife photography.
For mastering wildlife photography you have to have the basic knowledge of camera handling. As majority of the photos you take will be captured with the help of telephoto lens. This will test your patience and dedication as you have to wait a much longer time for the animal to come in the range and taking right pictures through right angles before that wild animal leaves from the site. Many of the times the animals you want to shoot will be yards away from you so that you have to take your pictures with more precision and care with zoom lenses.
While shooting wildlife you always have to watch out for minute movements happening around you. And for that purpose you have to be attentive for the longer time. The sunlight also plays a very important role in taking these wildlife pictures. For this purpose your camera should have the proper adjustments according to the various angles of sunlight so that pictures will be much clearer without any fuzz.
Also wildlife photography is all about capturing a particular moment of the wildlife. It makes or breaks your photography style. Many of the best wildlife photographers out there are really skillful in shooting the exact speed and momentum of the particular animal they are watching. But to be the best wildlife photographer out there you should first master the basics and you can begin this process by starting to shoot your own home pets. If you learn to shoot their natural movements and habits in their natural style then you can say that you are ready for outdoor wildlife photography.
There are no shortcuts to learn the basics of wildlife photography. Rather you have to practice it religiously and with full devotion. You should have to pay a special attention to your cameras. You have to take care that your camera has a quick shutter speed which is very necessary to take more than one shot as you roam around the wildlife to take pictures. In this type of photography most of the times you have to follow your subject to shoot many pictures at a time in one shot. This process is mainly known as "panning" which consists of taking faster pictures in one snap as you mover closer to a particular animal you want to shoot.
Thus wildlife photography is all about your patience, persistence and shooting skill where you need to wait a longer time to take the perfect picture. But at the end of the day it is also the most satisfying art where you get the really thrilling and enjoyable experience to cherish for.
Saturday, February 26, 2011
Using Depth of Field for Photography
credit,credit
It's one of the greatest tools available to photographers, it's easy to use, and yet it's among the least known and used abilities of a camera today. Pro photographers have used it for decades, but the amateur can use these same techniques without paying the professional price. It's called depth of field, and it's accessed through the use of the aperture.
The aperture, simply put, is the hole that light comes through in your camera. Light passes through the front of the lens, through a series of glass pieces, through a hole at the back of the lens, and into the camera. The aperture is the hole in the back of the lens, and you get to control this vital part of the camera, if you decide to want to bump up your pictures. You can place the camera on auto, and the camera will adjust its aperture, shutter and more to the situation it sees. By placing the camera in more manual modes, you take on powerful and personal control, and YOU get to decide what you want to create with your photographs.
An important factor here is lighting. Any photography relies heavily on the lighting that you are using, whether it be from the natural, ambient light around you, or artificial light, like a strobe or other flash unit. Especially while using natural light, it will be important to use a tripod to keep the camera steady while shooting. If you are shooting on a cloudy day, without much light, then the camera must compensate for less light by having a longer shutter speed, which it will do automatically in the mode I'll be explaining in a moment. A longer shutter speed means the camera won't be able to have a clearly focused picture without the use of the tripod.
Depth of field simply means the area of focus, or the area in the picture that is in focus might be a more accurate term. Photography is a two dimensional medium, having height and width, but it lacks depth, the third dimension. Your photography can create the illusion of that depth through a few easy camera settings. You may be asking yourself, why would I want to create the illusion of depth, and what is it good for? Part of the reason is to create a sense of emphasis. When you take a picture of a large area, with trees, birds, squirrels, people, rocks, etc, what is the thing or object that you are zeroing in on? Is there anything that you really want to emphasize to your viewer? If so, it's probably getting lost in the crowd of other things on the scene. The squirrels are so small you can barely see them, the people are walking their dogs, and the trees are swaying in the breeze. But what if you wanted to focus on the viewer on the flowers in the garden? When you create emphasis on an object, it strengthens your photo, and actually guides the eye of the viewer to that object. You could take pictures to create a story about that, as you can read in my article about photo stories. When you get in to take close-ups of the flowers is where the possibilities of great photography begin.
Emphasize the garden by focusing in on one or two flowers at a time. Grab a tripod, get down to eye level with them, and then get ready. Place your camera in a mode that allows you to change your aperture; the mode is usually called "A", or "AV" on some models. Film cameras can allow these changes too, on SLR models. They require you to simply change the f-stop manually on the aperture ring. On your digital camera, use your selector buttons to change your aperture. You'll see on your digital camera, most likely, a letter f, with the number on the readout on either the monitor, or the info panel on the top of the camera, or perhaps both areas. The f means f-stop, which is the name commonly used to describe the number of the aperture setting. The best way to emphasize a flower is to have only that flower in focus, and to have the rest out of focus. Change your aperture to a really low number, such as 2.8, 4, or 5.6. When the lens is at a low number like this, the lens hole is wide open, but it is creating a small area or depth of field; basically an inch or two will be in focus. Focus your camera, and shoot. Now, look at the camera, and look at your pictures. The one or two flowers should be in focus, but do you see how the background is fuzzy and out of focus? This is what is called a "shallow depth of field", and that comes from using a small number f-stop. That's because you've taken control of your camera, and changed the outcome! Because only the flower is in focus, and the rest is blurred out, you have guided your viewer to what YOU want to emphasize! You have used one of the most powerful tools available for a photographer to bring a new focus to your pictures. Try this with a lot of different scenes; look how the item is forced to really stand out for you because it's the only thing in focus.
Now, on the opposite end of the spectrum are the pictures that have the entire photograph in focus; such as a lighthouse standing out from the beach, with horseshoe crab shells in the immediate foreground. This is also done by changing the depth of field of your camera. Here, you again change your aperture, but this time place it on a high number like 16, 22, 28, etc. This is to create a large depth of field by using a small hole in the back of the lens. Again, you must use a tripod to keep the camera steady. Take a picture with something in the near foreground, such as a rock or the crab shells, and then compose your picture with a mountain or some other object some distance away, focus, and shoot. Remember to use the rule of thirds here for additional emphasis. As you'll see, both areas should be in focus, again showing the third dimension and creating the illusion of depth. This is a large depth of field.
It's a little known tool in the photographer's toolbox, but almost any camera made in the past four years will have some sort of ability to work with depth of field, whether they have a point and shoot or DSLR. Every photographer, of every level, has the ability, through practice, to create beautiful photographs that can rival those of the pros, by using the tools available with every camera. Use the strength of depth of field when you create the third dimension in your photographs, and add a new and incredibly
powerful personal dimension to your photography.
Six Tips to Help You Clean and Organize Your Photography Studio
source
1. Photography Studio Organization - Use good old fashion hanging files.
Believe it or not, in this digital age, the classic green hanging folder is still a great organization tool. Using manila folders to organize your photography studio's bills, invoices, and receipts is a good start. It is a lost cause however, if you don't have an organized place to put them. The hanging folder is the perfect place to put them
Don't have a filing cabinet to put the hanging folders in? Not a problem. There are several options available at your local retail store. I prefer the clear Rubbermaid bins. They are about 8 inches wide. This means they are easily stored in closets or on a bookshelf. Since photography studio space is usually valuable real estate, these smaller file boxes might be the way to go.
2. Photography Studio Organization - File your files
A great way to keep your files organized is to keep a file of all your files. What do I mean by this? Keep a piece of paper in your photography studio with all of your file folders on with their names. If the folders have sub-folders, list those too.
This will let you see if you have folders that overlap so that you can condense your folders. For example, there is no point in having studio file and a studio equipment file.
You could have this list written on a piece of paper, but that would just be one more piece of paper to file. Try keeping this record in a word or excel document. That way you have one less piece of paper in your office and you can update it much easier when you add new folders and files.
3. Photography Studio Organization - Throw things away
For some reason most photography studio owners have a fear of throwing client paperwork and photos away. There are certain things that you just don't need to hang on to. If you are a digital photographer there is no reason to hold on to basic prints. Create a varity of back-ups and toss the prints. You can always re-print them. If you aren't a digital photographer and have a traditional photography studio, invest in a scanner. This way, if you must hold on to prints for color purposes, you can scan them and toss the print.
There are some things you need to hold onto though.
Tax items are one thing you should hold onto. You should save your tax returns forever. The rest of your tax reports and receipts should be saved for no longer than six years.
Throw away papers that you don't have an immediate need for, can get a copy of easy, or that don't have any tax or legal reason to hold on to.
If you feel like you need to hold on to all your photography studios paperwork, than try scanning it all onto a portable hard drive. Then you can throw all the papers away. It will take more time than growing through all the papers away, but at least the hard drive will take up less space in your office.
You can scan model's head shots for reference later. You can scan pose ideas from magazines so you don't have clipping all over your photography studio.
4. Photography Studio Organization - "Assorted" Folders
How many other, assorted, or misc files do you have in your photography studio? You know, the folder that you put everything in that you just don't know where else to put it. That isn't organization. Odds are you can just throw it away altogether. A good rule of thumb is, if you haven't needed it or touched it in a year then toss it.
5. Photography Studio Organization - Get rid of business cards
There are so many ways to organize all your business cards, model head shots, and contact information. There are plenty of ways to get rid of it altogether as well. A simple approach is to take the business card or headshot and tape it or staple it the file folder it is associated with. At least then it is filed away instead of in a pile on your desk or in a drawer.
There are lots of gadgets out there made for scanning in business cards to your computer. If you are a digital photography studio, you probably already have a scanner, put it to good use. If you don't have the money for one of these than just take some time to enter the contact information into your electronic address book. Outlook has a great address book or you could even use your email clients address book. Anything is better than having them just laying around waiting to get lost.
6. Photography Studio Organization - Use the computer
Try using your photography studio's computer as much as possible. Use it to make your to-do lists, create address books, file documents, and more. The more you keep or put into your computer the less you have in your photography studio.
As I mentioned before, there are plenty of gadgets out there that can help you scan your files into the computer. Take advantage of them!